Custom All-in-One PC Part 1: Disassemble and Paint Sceptre Monitor
How to disassemble a Sceptre 20" LCD monitor to custom paint it purple using spray paint.
So it all began with a forceful statement: "I want a purple unicorn computer!" Hearing that request got me really excited about figuring out a way to make it happen and make a kid very happy.
I decided to build a low-cost, low-power all-in-one computer powered by a Raspberry Pi that would be easy to use and fulfill the original requirements of my customer :). This post is the first in a series, today we'll be focusing on the painting of the monitor.
Disassemble and custom paint Sceptre MonitorThe Monitor
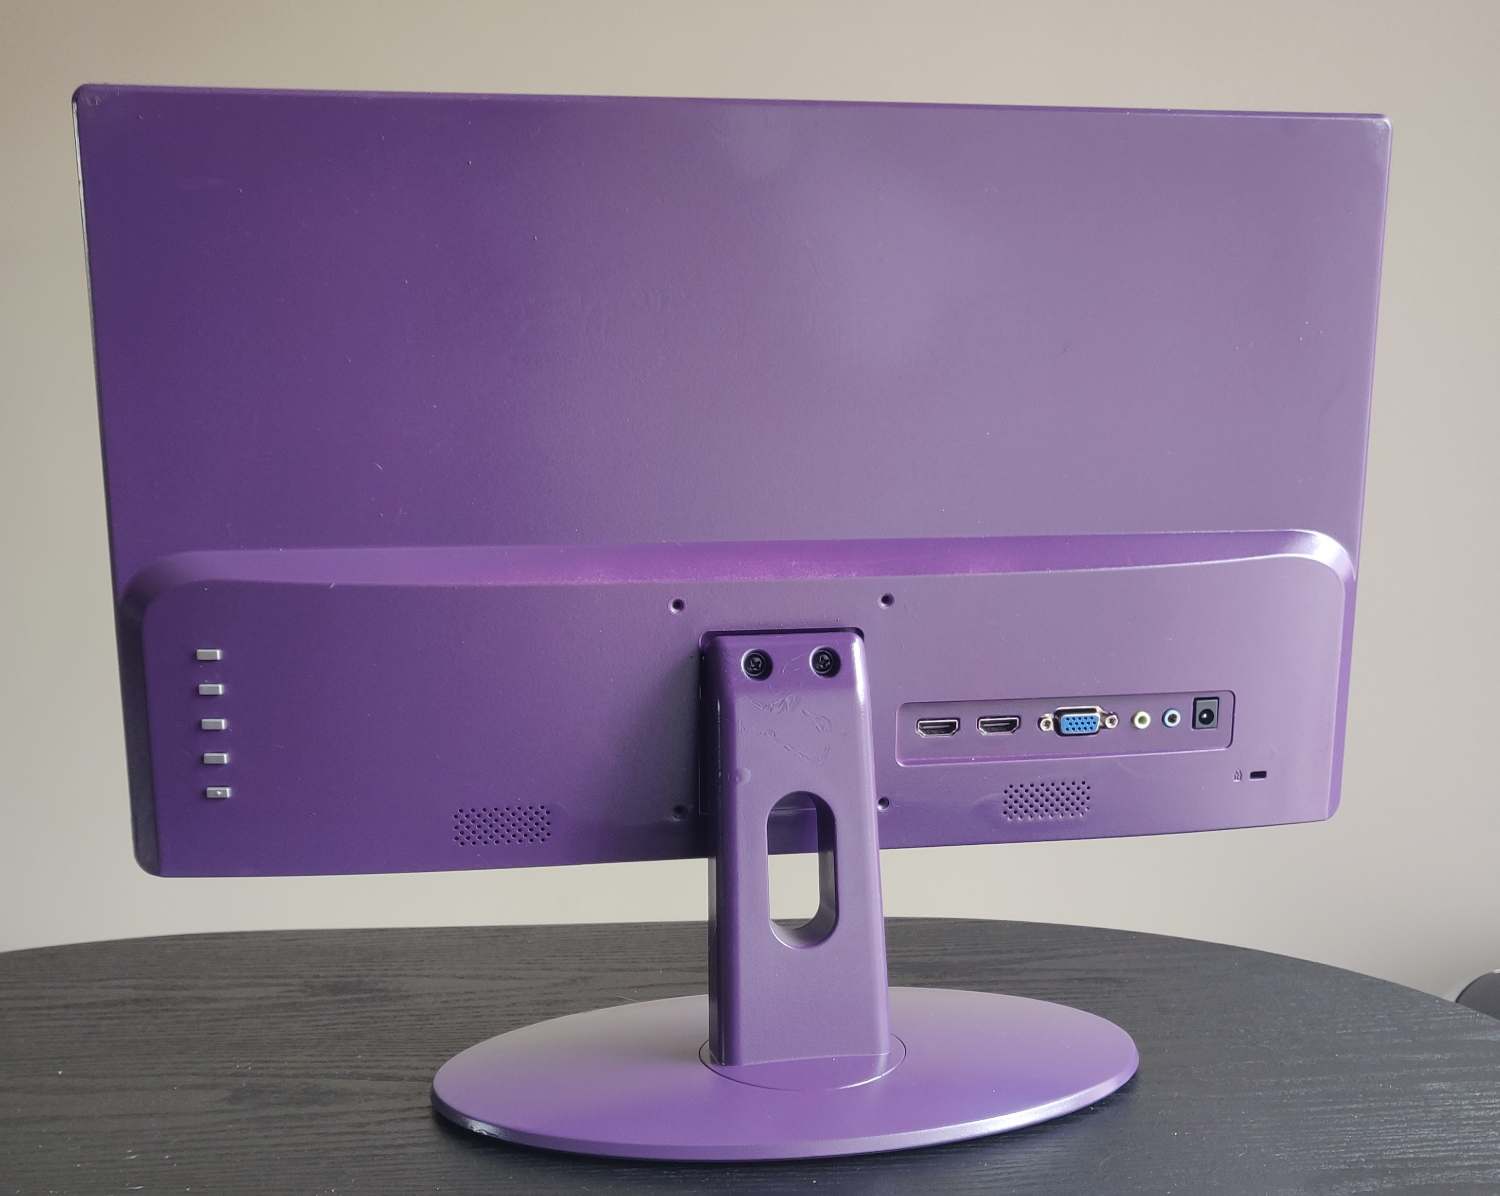
I decided on the Sceptre 20" "ultra-thin" LCD monitor mainly due to the price point. At $80, I figured I couldn't really go wrong and it wouldn't be so terrible if I destroyed the monitor in the process. It also looks pretty slick, and reviews I watched on YouTube mostly indicated it is a great value.
I ordered the monitor and it arrived within a couple days, so I got cracking right away.
The Paint
In order to make sure I got the color just right, I left the choice of color up to the customer for this build, who ended up picking a purple gloss spray-paint. This one is an "all-in-one" which also has primer, which I didn't realize while I was painting, so I did a coat of primer before starting.
Disassembly
I bought this monitor not knowing whether or not disassembly/re-assembly would be possible without damaging the device. I was happy to find out that it was indeed. I would not do this without being ready to accept that you might damage your monitor. This monitor is not assembled with screws, and it does need to be pried open - I wasn't able to do this without leaving any marks, so keep that in mind.
Here is the disassembly process I used:
- Insert a sharp knife or in the seam on the top of the monitor.
- Once you are able to insert the knife in a bit, try to open up the seam a bit (don't try too hard, you will see it is very strongly bound together and might bend your knife)
- Using the bit of play that you have, insert a flat-head screwdriver or small chisel into the gap. This needs to be a decent-sized screw-driver head, as you need sufficient leverage without digging in to and destroying the plastic.
- By levering the screwdriver, you should eventually hear a pop - repeat this process all round the frame of the monitor, on all 4 sides.
- Be careful not to just let any side fall - there are cables that need to be disconnected before the two halves can be separated.
- Disconnect the button panel cable and the speaker cable from the main board (the two cables can be seen disconnected here)
- Unscrew the button panel and remove it (temporarily remove any tape that is holding the wires in)
- Remove the push buttons
- On the front half of the monitor, pop off the front panel from the LCD screen - this can also be done by using a small screwdriver, but be careful - this part is more delicate
- Rest the LCD screen on the plastic/styrofoam for safe-keeping during painting
The process for painting:
- Set out all parts in a well-ventilated, clean area
- Use an air blower to remove any dust, hairs, etc. from the parts before applying paint, as stuff will get "baked in" to your monitor if you paint on top of it
- I did not do this, but one lesson learned is - I will next time find a mesh drying rack (what's used to dry baked goods) to paint on - so the paint won't clump up on the bottom side of whatever is being painted
- Apply even layers of paint by spraying from far away and doing even sprays from side to side - practice and make sure there is a good flow before spraying the monitor - it's important to spray evenly and from a distance so as not to have paint clump on the surface, which will mess with the tolerance and cause issues re-assembling
- Use a mask or respirator
- WAIT at least 30 minutes between coats - my impatience caused this not to look as good as it could have
- After applying 2-5 coats - let it dry overnight. It might feel dry, but if you start handling it, pressing it, etc. you will notice paint come off and it will mess with the finished surface.
Notes for re-assembly:
- Use the plastic covering and styrofoam packaging that the monitor is shipped in to your advantage - rest the delicate parts on it while you're working
- If you have someone to lend an extra hand - involve them - some of this maneuvering can be hard to figure out alone (but it's still possible)
- If you've had paint clump up on some parts and it's preventing the monitor from snapping closed, use a knife or chisel to remove the extra paint - be careful not to remove rubber padding
- When re-assembling the button panel - make sure that you insert the panel under the small tab - if you don't do this you'll see it does not sit properly and will look like it's sitting in an arch - consequently the top and bottom buttons will be easy to push while the middle ones will be very difficult
Conclusion
All in all, I was surprised by how well this went. I was concerned looking at the product photos online that the lack of screws would mean it is hard to disassemble/assemble, but it really wasn't too bad. Just remember that this is in no way returnable after doing this. You WILL damage the outer casing of the monitor by doing this.
In the next post in this series you will find out why this might be worthwhile to you even if you aren't looking to paint your monitor, as I'll demonstrate how I was able to fit a Raspberry Pi 4 into the body of the monitor to turn it into an all in one PC.
Thanks!
Please note that I only link products that I have bought and tested myself, and some of the links above are Amazon affiliate links, which I earn a commission from (at no additional cost to the buyer).