Raspberry Pi 4B All-in-one Kids' Computer Part 2
I build a custom all-in-one kids computer based on a Sceptre 20" monitor and Raspberry Pi 4B SBC. It was a really fun project and I was able to end up with a clean look and only a single cable needed to power and operate it.
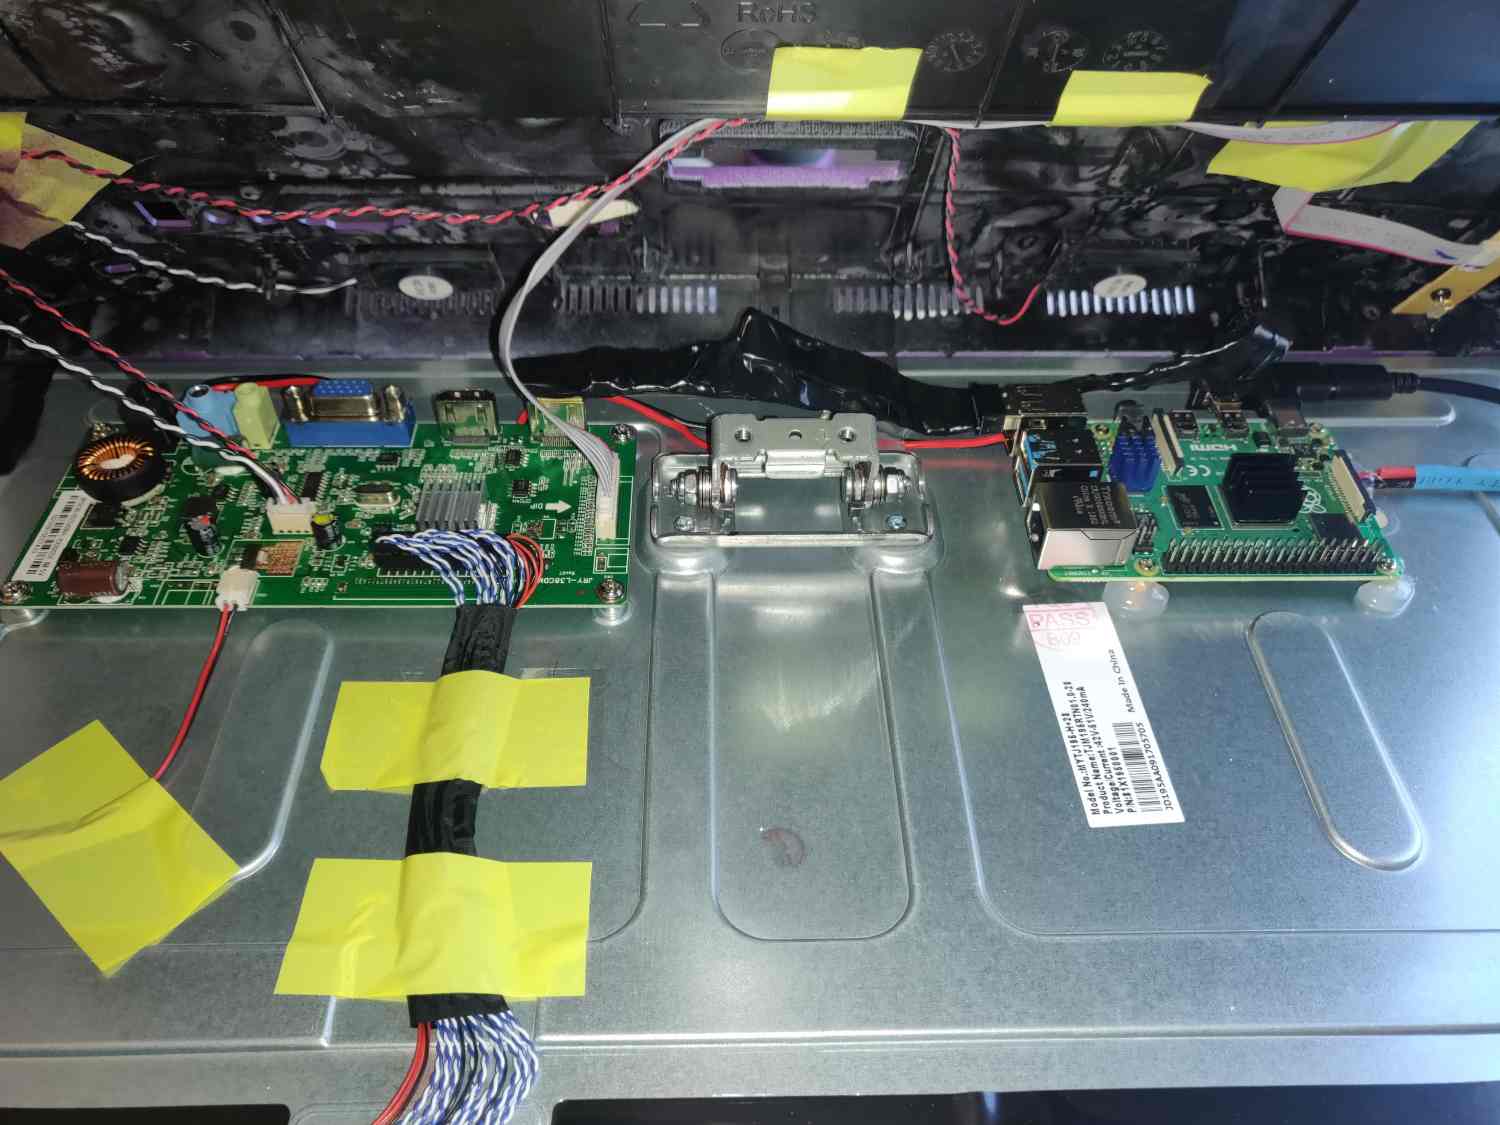
This is a custom build of a kids computer based on a Raspberry Pi 4B 4GB RAM board and housed inside of a 20" monitor case. For info on how I disassembled and painted the monitor, see the Part 1 post.
This was a really fun build to complete. I went into it not sure if I'd actually be able to fit the Raspberry Pi inside the empty space in the monitor, and was pleasantly surprised to find out that it all worked out fairly well. The price of the whole build ended up at around $230 Here are some photos of the build progression and final results, followed by a parts list:
Raspberry Pi 4 All-in-one Kids Computer Part IIParts List
Monitor/Housing
- Sceptre 20" Ultra-Thin Monitor - overall this is a great little monitor for the price (I ordered it at around $80). It is not a premium monitor, that's for sure - but at this price point is is hard to go wrong (I have occasionally seen better monitors for this price, but it is rare)
- Kryon All-In-One Purple Gloss Spray Paint - this is the spray paint I used, pretty nice as it has primer mixed in with it - I could have done a better job painting with more prep/patience so I would blame the imperfections on me more than the paint
- Unicorn Keychain - because one of the most important requirements was that this be a "Purple Unicorn" computer, I got a unicorn keychain which I cut to size and glued on to the front of the build
Internals
- Raspberry Pi 4B 4GB RAM - this board is adequate for this type of build - it will mostly be used by a young kid to watch youtube videos/play games on the Chromium browser. With a heatsink on CPU and RAM Temps get up to around 60 degrees C with regular use (with a stress test running for >10 minutes they eventually get hot enough to throttle). Idle temps are 45-50 degrees.
- To mount the Pi, I used 6mm standoffs from this set and hot glued the board to the monitor panel
- 256 GB Samsung MicroSD card - At $30, you can't really go wrong with this card. Lots of storage and decent read/write speeds
- MP1584EN DC-DC Buck Converter
- USB-C power cable salvaged from a broken adapter
- USB-C 90 degree angle adapter - I had one of these lying around so just used it to make the power connection easier
- CYFPV Micro HDMI Type D Male "up-angled" - for HDMI out on the Pi
- CYFPV HDMI Type A Male Connector Left Angled 90 Degree - for HDMI in on the monitor
- CYFPV FPC Ribbon Flat Cable 0.5mm Pitch 20Pin for HDMI - this HDMI ribbon cable was great for this use-case but be aware, it must be insulated as this is unshielded. Without insulating this, the wifi signal severely interferes with the HDMI signal and makes the computer unusable. I addressed this with regular electrical tape (see build photos for more detail) and it worked great.
Everything Else
- Purple wireless Keyboard/Mouse combo - this is the model of keyboard/mouse I got. It looks like purple is no longer available, but the important part here is that it is wireless with a USB dongle. A wired one would not really be good as I wanted to have no exposed ports on the back. This accepts regular and rechargeable AA/AAA batteries, which I charge using a cheapo charger. This is really convenient as I have a few different sets of keyboards/mice that all use the same battery configuration.
- Soldering: I used this soldering iron which I've had for about a month now and really like so far. I used this flux and this lead-free solder. Work was done outside, while wearing a ventilator mask. I will eventually write a (beginner's) guide to electronic component soldering and list more details there.
- Hot glue: I used lots of hot glue in this project, as I do in most builds - I used this combo hot glue gun/sticks which is cheap and has worked incredibly well for me.
That's about it. Thanks for checking out the build and I hope you found it interesting!
Please note that I only link products that I have bought and tested myself, and some of the links above are Amazon affiliate links, which I earn a commission from (at no additional cost to the buyer).